
This guide is intended for ATLEX company clients who have purchased virtual hosting services and want to configure email functionality through The Bat! email client. We will walk through the installation and configuration process of this email client step by step for working with your email account created on ATLEX hosting.
About The Bat! Email Client
The Bat! is one of the most reliable, fast, and secure email programs available today. We recommend using this email client for working with your email for the following reasons:
- High level of security
- Fast message handling
- Russian-language interface
- Simple configuration
You can download The Bat! from the official developer website: https://www.ritlabs.com/ru/products/thebat/download.php
Preparation for Configuration
Before starting to configure The Bat! email client, you need to create an email account in the cPanel hosting control panel. You can find detailed instructions for creating an email account in our Knowledge Base: "How to create an email account in cPanel".
Configuring The Bat! Email Client
Step 1: Creating a New Email Account
After installing and launching The Bat! program, a window will appear offering to create a new email account. If the program is already installed on your computer, select from the top menu: "Account" → "New Account". In the opened window, enter your email account credentials: email address and password. Click the "Next" button.
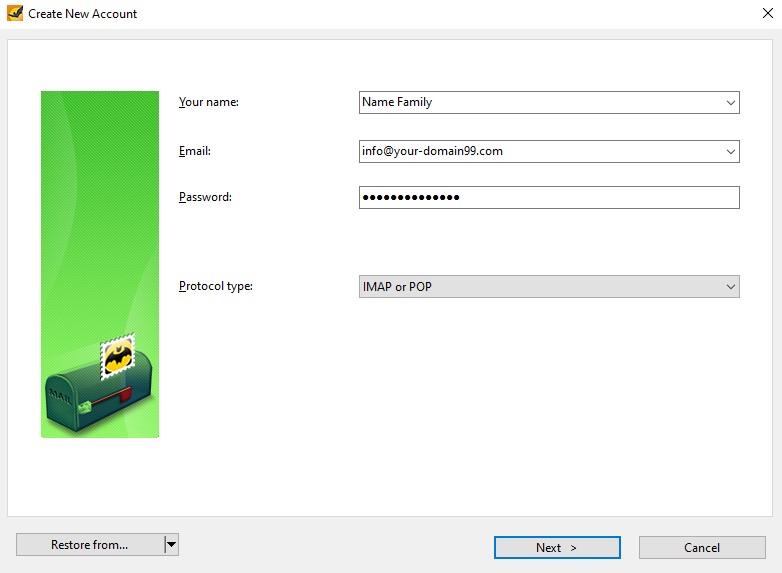
Figure 1: Creating a new email account
Step 2: Configuring Incoming Mail (IMAP)
In the opened window, fill in the fields:
- Protocol: select
IMAP - Server address: address: specify the address obtained when creating the email account in cPanel
- Port:
993 - Username: enter your full email address (in our example:
info@your-domain99.ru) - Password: enter the password for the email account set in cPanel
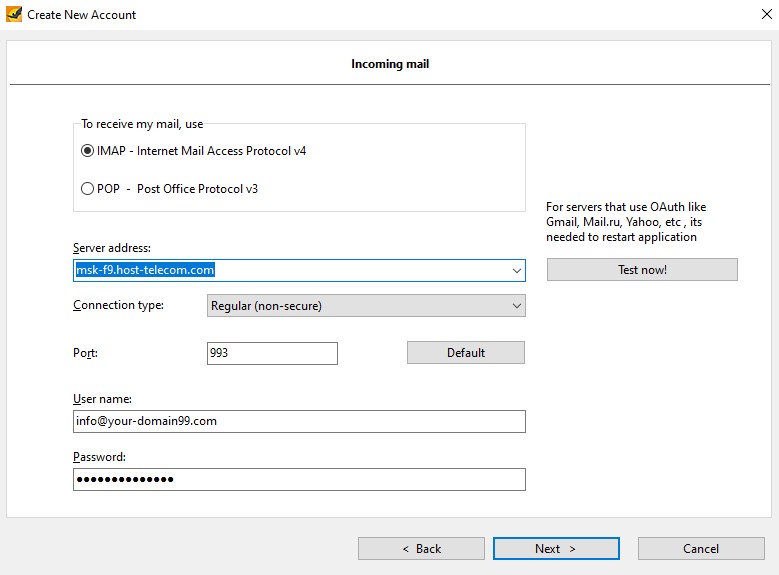
Figure 2: Configuring incoming mail
Click the "Next" button.
Step 3: Configuring Outgoing Mail (SMTP)
In the opened window, specify the settings for the outgoing mail server:
- SMTP server: specify the address obtained when creating the email account in cPanel
- Port:
465
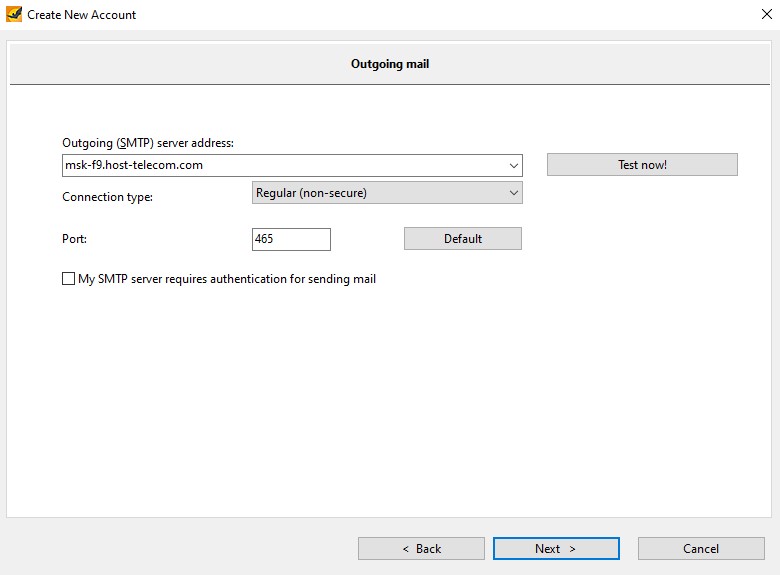
Figure 3: Configuring outgoing mail
Click the "Next" button and complete the email account configuration process.
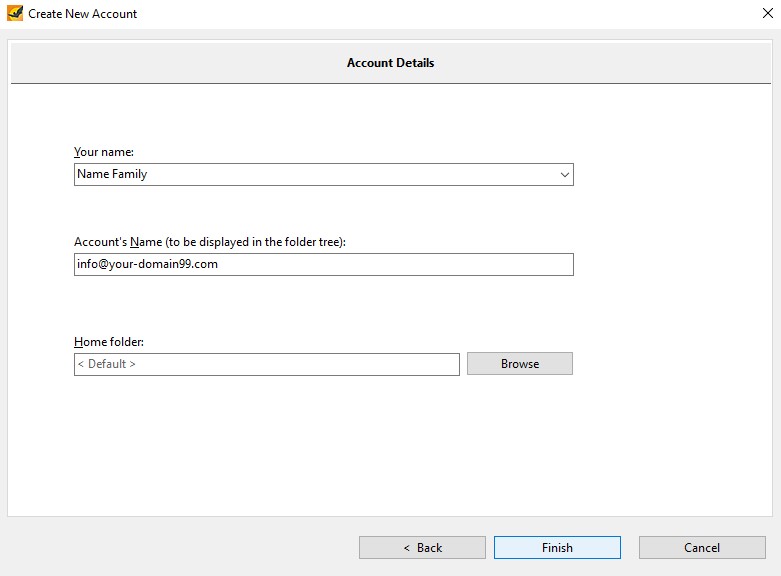
Figure 4: Finishing the email account configuration process
Checking Settings
You can return to settings at any time by right-clicking on the created email account and selecting "Properties".

Figure 5: Access to email account settings
The main settings are located in the "Transport" section:
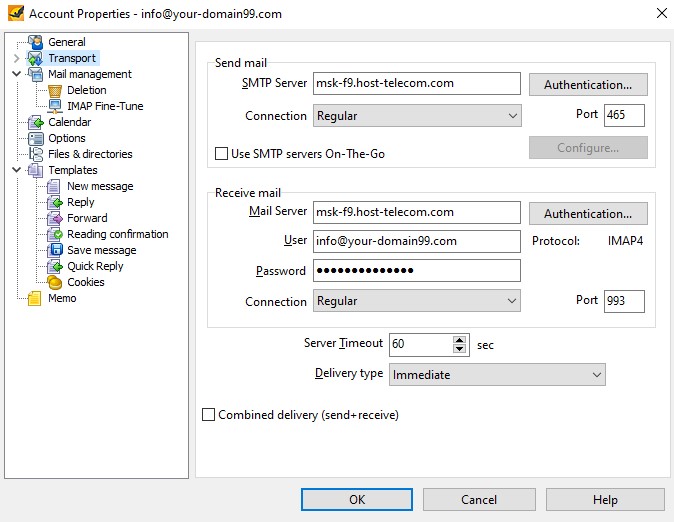
Figure 6: "Transport" section
Final Settings Verification
Make sure the following settings are configured:
- Email address:
name@<Your_domain> - Account (login):
name@<Your_domain>(your full email address) - Password:
********(your password) - IMAP server: server address obtained when creating the email account in cPanel
- IMAP port:
993 - SMTP server: server address obtained when creating the email account in cPanel
- SMTP port:
465
Now your The Bat! email client is configured to work with the mailbox on ATLEX hosting. You can start sending and receiving emails.
Please note that our Knowledge Base also contains a guide for configuring Microsoft Outlook email client, which may be useful if you prefer to work with that email client: "How to configure Microsoft Outlook email client".
We wish you pleasant work with email and hosting from ATLEX.Ru!
